Posted on

Advantages of Live, Real-Time Telepathology

Microscope technology has evolved tremendously over the past several decades, far beyond simply adjusting light intensity, changing objectives, and positioning and focusing a specimen — with digital telepathology, anyone with an internet connection can review microscopic samples remotely. Let’s examine what real-time telepathology is and the advantages that microscopes like the ACCU-SCOPE RC500 have over traditional models.

What Is Digital Pathology?

Digital pathology first emerged in the 1980s and has advanced considerably since its introduction. Thanks to numerous technological advancements over the years, it is now an indispensable part of countless institutions.

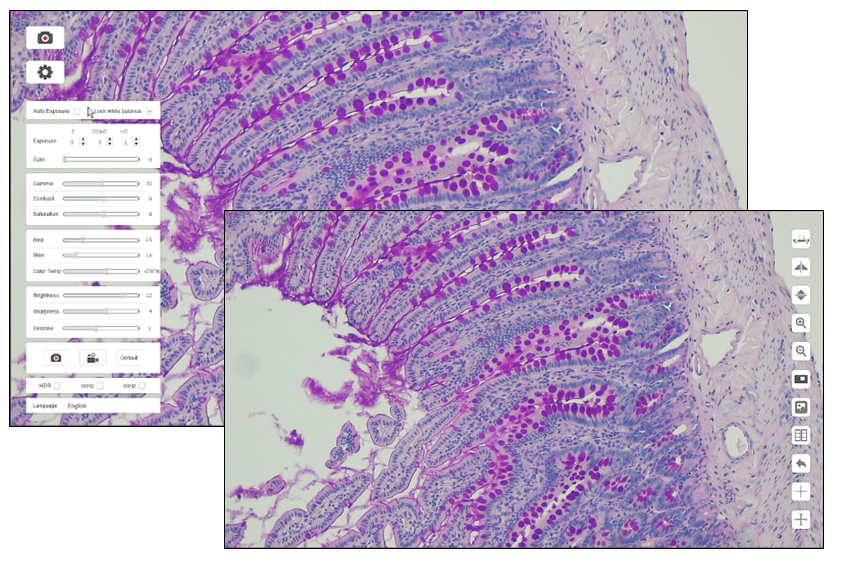
In its infancy, digital pathology relied on the capture and sharing of static images with the remote reviewer. Digital pathology has evolved to utilize whole-slide imaging to scan and digitize entire glass slides, then store and share the digital slide files via the internet. In addition to capturing static specimen images, some digital pathology technology can capture and permit the viewing (streaming) of live images as well.

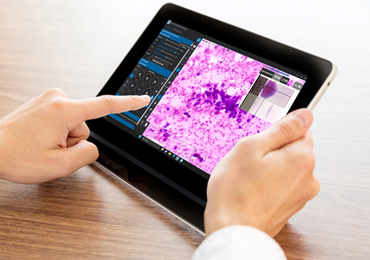
The creation of high-quality specimen imagery allows individuals to easily view, analyze, and manage pathology samples on an electronic device of their choice. In short, digital telepathology allows for remote functionality over long distances so long as there is an established internet connection.

The Benefits of Real-Time Telepathology

One of the greatest strengths of real-time telepathology is that it allows a remote user to access and review live images of patient slides from long (or not-so-long) distances. This is particularly useful given the increasingly constrained availability of pathologists, including when they are not local to the hospital labs for in-person viewing.

For example, real-time telepathology enables healthcare professionals to review slides from patient cases in rural regions without having to transfer the physical slides to a faraway hospital. Given how delays in diagnosis can be dangerous, real-time telepathology has the potential to save lives through its accessibility to pathologists, regardless of their location. Remote functionality also allows remote viewers to review samples from biopsies and fine needle aspirates (FNA) while the patient is still in the operating room.

In addition, this innovative approach to pathology can help reduce costs and improve the speed and quality of patient care. It allows sub-specialists to review difficult cases or provide second opinions and enhances the coordination and communication between all medical personnel in a particular patient’s care team. The accelerated decision-making brought about by this remote collaboration leads to greater productivity, improving patient care as a result.

The ACCU-SCOPE RC500 is a remote collaboration system designed for real-time telepathology and consists of a motorized microscope, motorized stage, computer, and software. By logging into the RC500 computer desktop, a remote viewer has full control of the microscope and specimen position – the only operation the remote reviewer cannot do is place the slide on the stage. It’s worth noting that the RC500 can also function as a traditional microscope when not being used for telepathology, allowing for greater flexibility and multipurpose usage in the laboratory.

What Is Rapid On-Site Evaluation?

Rapid On-Site Evaluation (ROSE) refers to the near-immediate review of a patient sample by a pathologist. Tissue biopsies are taken from a patient in the operating room (OR), the biopsies are prepared and reviewed by a pathologist, all while the patient is still in the OR. Normally, this would involve the pathologist visiting the pathology (frozen section) laboratory located near the OR. Thanks to real-time telepathology, the pathologist doesn’t need to come down to the frozen section lab to review the sample — rather, they can do so quickly and conveniently from their office.

OSEA (On-Site Evaluation of Adequacy) is one version of ROSE in which fine needle aspiration (FNA) types of biopsies are reviewed to provide a quick determination of whether there is sufficient (adequate) cellular content for a cytopathologist or pathologist to render a diagnosis, classification or disease stage of the specimen. As pathologists are not always readily available to review a ROSE case, a cytopathologist or cytotechnologist may also not be available to review OSEA cases and, therefore, remote telepathology can play a critical part in providing fast access to the medical experts to determine sample adequacy.

Applications of Remote Telepathology

There are numerous medical disciplines that utilize remote telepathology, including pathology, cytopathology, hematopathology, anatomic pathology, microbiology, dermatopathology, and many more. As such, the seamless automation and remote viewership of this technology naturally lead to a diverse range of applications.

For example, remote telepathology can be utilized in healthcare settings for patient diagnosis, clinical research, and even resident training. In addition, this technology is a highly effective tool in educational environments beyond just healthcare. Digital images can be acquired from any specimen, saved to a network or the cloud, and then accessed from any device, allowing students to easily view the digitized samples outside of class. Furthermore, the digitized samples ensure that all students experience the same “slides” and the same locations/features on the slides, thereby standardizing the learning experience.

If You’re Interested in Learning More About an RC500 Microscope for Your Institution, Contact ACCU-SCOPE Today

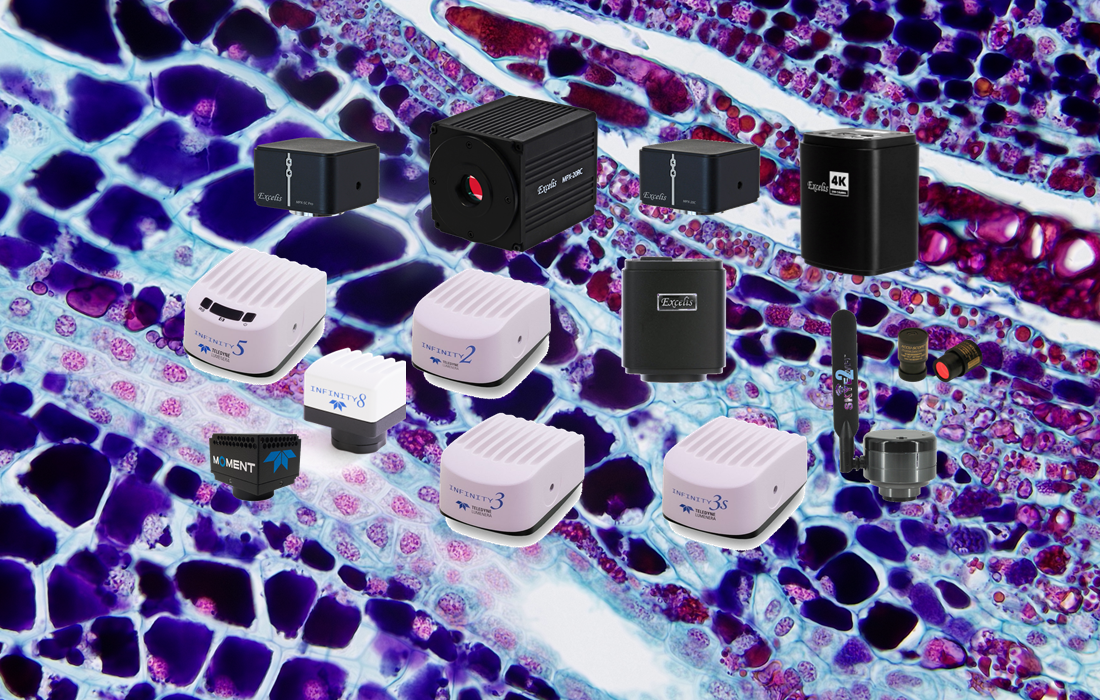
To bring the benefits of remote functionality to your laboratory, reach out to ACCU-SCOPE. In addition to the RC500 microscope, we also supply traditional microscopes, high-quality digital imaging cameras, and more. Contact us today for further information and to place an order for your organization.

Posted on

Understanding Depth of Field and Depth of Focus in Microscopes

Depth of field and depth of focus are both well-known terms in photography, filmography, and microscopy. Given how similar their names are, they have sometimes been used interchangeably. However, despite both playing a vital role in camera and microscope optics, the two are very much different. Let’s look more closely at what defines the depth of field and depth of focus, their role in microscopy, and why the two should not be confused with one another.

Depth of Field

The depth of field is the distance between the closest object plane in focus and the furthest one in focus. In other words, it can be considered a lens’s ability to retain the quality of an image without moving the object farther or closer to the frame. Depth of field relates to how much detail can be seen above and below the optimal focus position.  When objects are placed at a set focal distance away from a lens, detail can blur and thereby degrade the resolution. As a result, smaller objects naturally lead to reduced depth of field for the lens. It is worth noting that the depth of field will increase as the condenser numerical aperture (condenser aperture diaphragm) is closed down (approaches zero).  While depth of field increases when the condenser aperture closes, resolution decreases.

Depth of Focus

Depth of focus is the imaging complement to depth of field and is more concerned with the tilt of the sensor plane of the microscope with respect to the lens image plane. This concept relates to how the quality of focus is altered as the object stays still and the lens’s sensor side changes. Therefore, the depth of focus will change significantly based on the magnification of the object and the microscope’s ability to focus light, known as the numerical aperture. Depth of focus has little to do with sensor size and is more closely related to sensor perpendicularity to the optical axis and pixel count — the more pixels the sensors have, the more noticeable sensor tilt will be on the quality of the image. Given how digital camera sensors are exposed at a given focal plane, depth of focus impacts the quality of the resulting image and is an essential consideration in photomicrography.

Depth of Focus vs. Depth of Field: How They Differ

As described above, depth of field and depth of focus relate to different perspectives. However, they are not entirely separate, as they both correspond to the axial depth of the space of a particular plane — depth of field relates to object space, whereas the depth of focus involves image space. This, in turn, influences their applications. For example, low-power objective lenses generally have lower numerical apertures and will have a higher depth of field (detail is lost quickly above or below the optimal focus plane) and higher depth of focus (sensor tilt is less impactful to image quality), while high-power objective lenses will have almost the reverse.

For Microscopes and More, Give Us a Call

Now that you have a better understanding of the depth of focus vs. depth of field differences and how they affect the quality of microscopes, see their influences for yourself with the help of ACCU-SCOPE’s high-quality microscope products. We offer a range of upright, inverted and dissection microscopes and various microscope accessories for laboratory settings and other environments. To learn more information about our products, give us a call today.

Posted on

How Microscopes Support In Vitro Fertilization

For centuries, biologists have been curious about the development of embryos. Because of the advancements in microscopy, our understanding of embryogenesis has not only evolved but now some of our best medical professionals use optical technologies to help women become pregnant.

When a woman and her partner struggle to conceive, they often turn to assisted reproductive technologies (ART) to achieve pregnancy. ART treatments include in vitro fertilization (IVF), intracytoplasmic sperm injection (ICSI), and intracytoplasmic morphologically-selected sperm injection (IMSI). Each method aims to fertilize a female’s egg outside of her body. For the procedure to go smoothly, the IVF laboratory must have high-quality microscopes to support ART.

Ways Microscopes Can Aid Assisted Reproduction

There are several reproductive medicine approaches that use different microscopy techniques to enhance a woman’s ability to become pregnant. These reproduction techniques are IVF, ICSI, and IMSI. Before fertilization can occur, an IVF scientist must take steps to prepare the sperm and egg. Each of these steps requires the use of microscopes. Let’s take a closer look at these procedures:

Semen Analysis

Before artificial fertilization can occur, an experienced scientist evaluates the quality of the sperm. They typically use an upright microscope to determine the total number, motility, and morphology of the sperm. Only healthy sperm will be used for fertilization. This pre-selection process requires a microscope with DIC or polarized light illumination.

Oocyte Preparation

After extracting oocytes from the female patient, the outer egg cell layers (besides the zona pellucida) are removed. This process is called “denuding” and is performed in a Petri dish while observing under a stereo microscope. The egg is transparent, so excellent illumination and contrast control are essential to be able to see the egg and its layers. Diascopic stands are the stereo microscope stands of choice and feature a tilting mirror to angle the light to provide oblique or darkfield contrast. Once this step is complete, the IVF scientist evaluates the morphology of the oocyte using an inverted microscope for its high magnification and easy accessibility to the egg for micromanipulation. If abnormalities are detected, the oocyte will not be used during fertilization.

Fertilization

Once the healthy sperms and oocytes have been isolated, artificial fertilization follows next. With ICSI, a single sperm cell is injected into an oocyte using a micromanipulator. The oocyte’s zona pellucida and polar body must be visible for this procedure. An alternative to ICSI is IMSI, which involves the extra steps of assessing sperm morphology using an inverted microscope and injecting sperm with the desired morphology.

Embryo Growth

After the eggs are fertilized, an embryologist monitors the growth and development of the embryos over the next few days. They look for any imperfections in the embryos. Only the best and healthiest embryos are implanted into the mother.

How to Choose a Microscope for IVF Applications

ART laboratories require a range of microscopes to complete various clinical procedures, such as gamete selection and embryo monitoring. Choosing the right microscope requires considering several factors, including the specific operation or application and the microscope’s features. When selecting a microscope for IVF applications, look for the following features:

Stereo Microscope

  • A zoom range that provides enough magnification to see detail in the egg
  • Diascopic stand that generates the necessary contrast to reveal the detail in the egg

Inverted Microscope

  • An inverted design that allows access to the cells or embryos for manipulation
  • A range of objectives to ensure sufficient magnification that facilitates observation of the specimen and the use of micromanipulation tools during sperm and egg cell handling
  • A built-in camera port to support the use of a digital camera for viewing specimens and documentation

Need Microscopes for IVF Procedures? Turn to ACCU-SCOPE

IVF laboratories need high-quality microscopes they can rely on. If you’re searching for stereo, inverted, and upright microscopes to outfit your IVF and embryology laboratory, you’ve come to the right place.

At ACCU-SCOPE, we have a wide selection of microscopes used for embryology and IVF, including stereo and inverted microscopes with cameras. We can even equip your lab with stereo stands and accessories that work with various microscope models.

Contact our team today for help choosing the right microscope for your application!

Posted on

The Best Microscopes for Educational Environments

An educator’s job is never done. Whether it’s the start or end of a school year, teachers and professors are constantly on the lookout for top-of-the-line microscopes for education. They want to equip their students with the tools they need to explore the unseen world around them, stimulate curiosity, and make incredible discoveries. Unfortunately, microscope shopping takes a great deal of time, and if they look in the wrong place, all their efforts could be for naught.

Fortunately, ACCU-SCOPE offers a wide selection of the best microscopes for educational environments. With ACCU-SCOPE, you will be able to outfit your classroom or school laboratory with the affordable and quality tools your students need — whether they’re high school students getting a first glimpse at biology or graduate school students conducting their own experiments.

The Top Microscopes for Middle School, High School, and College Students

As you shop for the classroom, you’ll recognize a variety of factors to consider before buying a student microscope. For example, you need to decide whether monocular or binocular microscopes are ideal for your students’ needs and which magnification levels will suit your application. In addition, you’ll need to consider the device’s frame, optics, lighting, field of view, and resolution. There’s a lot to think about!

ACCU-SCOPE created this easily digestible guide to help you buy the right microscopes for your classroom. Here are some of the best options for educational settings:

EXM-150 Microscopes

Middle school and high school students are still in the introductory phase to microscopes and science as a whole. This means they generally don’t require the advanced features or super high magnifications that may be more of a distraction than they are helpful. Of course, this doesn’t mean educators should compromise on quality. Great images and extreme durability are still important. That’s where the EXM-150 monocular microscope comes in.

The EXM-150 series provides great performance at an affordable price. Its student-proof design makes it the perfect instrument for any setting. Inexperienced students can make precise observations without having to fuss with various settings. The mechanical stage is highly secure, so you can depend on it for years to come. Even better, this microscope features LED lights that budding scientists can use with or without a cord, plus an integrated carrying handle, making the instrument easily transportable.

EXS-210 Stereo Microscopes

The EXS-210 series holds true to the adage, “Big things come in small packages.” This compact stereo microscope provides quality, versatility, and performance at an affordable price. It is student-proof, has corded or cordless operation, and is easily transportable, making classroom set-up a breeze. It also uses our state-of-the-art optical coating techniques and LED illuminators for high-quality images, durability, and dependability. This microscope is highly favored by middle and high school students, homeschoolers, and hobbyists.

EXC-120 Microscopes

If your classroom requires microscopes that can withstand years of rigorous use and you want binocular or trinocular viewing for greater comfort and image quality, you’ll want to consider the EXC-120 series. These microscopes are specifically engineered for clinical and veterinary applications, and classroom laboratories, making them ideal for college and graduate students. An EXC-120 microscope features high-contrast objectives, a die-cast frame, ergonomic focusing controls, brass gears, and a wide field of view. With this microscope, it’s never been easier to achieve clear images while observing your specimen in a comfortable position.

3079 Stereo Microscopes (Dissecting Microscopes)

If your students are ready to take their observations to the next level, the 3078 stereo microscope series is the best option for you. Its top-of-the-line optical system provides high resolution, 3-dimensional views of samples, while its ergonomic and durable design makes it ideal for long-term use. These microscopes are frequently found in university laboratories and industrial and OEM applications.

Going Digital: The Future of Microscopy in the Classroom

Whether you’re buying microscopes for high school or college labs, you will want to consider equipping the classroom or laboratory with digital microscopes. These microscopes either have a camera already installed or have connections that allow for the attachment of an LCD camera. With these modern instruments, you can demonstrate important scientific concepts in real time by projecting the image on a screen for all to see. Your students can also easily share their findings by saving the images or videos for a report.

We recommend the following digital cameras for educational purposes:

  • Excelis HD Lite Camera: This camera works with most microscopes and allows HD live imaging of samples. The built-in software allows streamlined operation without a computer. The user can also capture images using CaptaVision+ software for editing and measuring at a later time.
  • SKYE WiFi 3 Camera: This camera creates its own WiFi network so the user can easily stream live images to a range of connected Android and iOS devices. Simply download the SKYE View 2 app, scan the QR code on the camera, and you’re ready to go! Thirteen students or more can connect to a single camera and view images simultaneously.
  • Excelis 4K Camera: This camera delivers high-definition color images to any 4K monitor and the built-in software allows operation without a PC. Alternatively, the user can connect the camera to a PC using a USB 3.0 cable and control the camera through the CaptaVision+ imaging software.

Get the Best Microscope for Your Classroom Today

No matter your education needs, ACCU-SCOPE has a microscope that is perfect for you! We have an expansive range of educational microscopes plus the expertise to help you decide which ones will meet your students’ needs best. We continue to expand our product line to develop and include the latest advancements in the industry. Contact us today to learn more about our educational microscopy solutions and keep an eye out for new product introductions.

Posted on

Top Considerations When Buying A Microscopy Camera, PART 8: Controlling Your Camera (software)

Something that many people don’t consider enough is how the camera is controlled.  Whether by mobile app, built-in software or computer software, this user interface is the way you communicate with the camera, view your samples and capture images or video.

Computer-based software offer the highest level of control for the camera.  From acquisition settings to image processing, calibration/measurement and reporting, computer software provides maximum flexibility and features.  In most cases, the software is free.  The caveat is that the software may not perform exactly as you like.

Figure 16. Examples of the graphical user interface for two software available from ACCU-SCOPE.  CaptaVision+ is a free software that is available with all ACCU-SCOPE Excelis camera.  INFINITY ANALYZE 7 is a free software that comes with all Teledyne Lumenera Infinity cameras.  The software are compatible only with the cameras specified.

One alternative may be to use software from a third-party supplier.  If the software doesn’t fully support the camera, it may be able to use a TWAIN driver to provide basic functionality and control of the camera.  Third-party software often includes the ability to control illumination sources, filter wheels, stages and even the microscope itself.  But all of this comes at a cost, as third-party software can be very specialized and expensive.  However, it can be worth the investment if you get the control and capabilities you need for your work.

More cameras are available with built-in software with basic acquisition controls and sometimes measurement functionality.  Usually controlled via a mouse, cameras with built-in software are ideal for stand-alone operation where there isn’t room for a PC or where the application only requires a minimal set of features.  These microscope and camera systems are generally more portable, too.

Figure 17. Graphical user interface of Excelis HD built-in software.  Notice the simplified settings menu (main image) and the measurement and annotation tools (inset image).

Some cameras have some level of built-in software, and the functionality has been reduced to a few buttons on the outside of the camera housing.  The Teledyne Lumenera Infinity 5 series are a great example of this, and they possess buttons only for power, white balance, and snapping an image.

Figure 18. Photo of the Teledyne Lumenera Infinity 5 series camera showing the easily accessible white balance, capture and power buttons.  On the right are sample specimen images captured with Teledyne Lumenera Infinity cameras.

Even cameras can now generate their own WiFi signals that are readily identified by our mobile devices.  Mobile apps offer the convenience of portability and multiple users, with some cameras supporting up to 10 or more simultaneously connected users.

Figure 19. Screenshots of SKYE View 2 mobile app on iPhone. Initial Interface is seen when the app is started. Click the [ ] icon to enter the camera pairing mode. Point the mobile phone camera towards the QR code on top of the SKYE WiFi 2 microscopy camera, then click Join. Main Camera Interface illustrates the variety of camera and image processing controls.

Choosing a camera that suits your needs is one decision, but don’t ignore the camera control software.  Both are required to get the job done.

This blog post concludes our series “Top Considerations When Buying A Microscopy Camera.”  We hope you found it interesting and learned something about microscopy cameras.  If there is another topic relating to microscopy cameras that you would like us to discuss, please share it in the Comments section.

Posted on

Top Considerations When Buying A Microscopy Camera, PART 7: Connections & Data Transfer

Today’s microscopy cameras offer a wide variety of options for connecting to the camera and transferring data including camera control, image viewing and acquisition.  Traditionally, cameras would feature one option for data transfer (e.g., USB port), but there is greater demand for flexibility in the way we connect to and control our cameras.

USB remains the standard for connectivity.  Using software on a PC (Windows and sometimes Mac), the camera settings can be managed to view and acquire images, and typically offers very good flexibility for image processing, measurement and analysis.  USB may also offer the convenience of providing power to the camera through the USB cable, thereby eliminating a separate power cord and adapter, while reducing clutter on the lab bench.  Sometimes, however, data transfer via USB can be slower than other options we discuss below – the exception is today’s USB 3.0 connections with direct data transfer to the PC’s motherboard.  To get the best and fastest performance from your USB camera when using a desktop PC, be sure to use a USB port on the back of the computer and not the ports in the front.

HDMI is a popular option for transferring a live stream of the image directly to a monitor (or TV) without the need for a PC.  Frame rates are typically 30-60fps, and some newer cameras produce 4K images.  Cameras require some form of control, and this comes in the form of built-in software (discussed in greater detail in our next episode).  Some of these cameras will also have SD card slots or USB ports for storage of captured images onto SD cards or USB flash drives, respectively. WiFi connectivity is increasingly popular as it allows students and scientists to connect to and control the camera with their ever-present mobile phones – simply download the app to the mobile device, connect to the camera, and you are ready to start imaging.  The mobile apps are relatively easy to use and navigate.  These apps offer a streamlined selection of features compared to the computer apps, yet are quite sufficient for basic camera control and image acquisition.  The one hiccup with WiFi cameras is that speed of live image viewing can be impacted by the resolution of the camera (more megapixels require more bandwidth to push the data over the WiFi), and this is compounded by the number of mobile devices simultaneously connected to that camera (the more devices connected, the slower the performance).

Figure 15. The SKYE WiFi 2 camera from ACCU-SCOPE creates its own 2.4G and 5G wireless network.  Any mobile device with the SKYE View 2 app can instantly connect to the camera and begin imaging.  The SKYE WiFi 2 camera will also operate as a USB camera.

Ethernet and Gigabit Ethernet (GigE) ports are finding their way into some microscopy cameras.  Where Ethernet runs at up to 100Mbps, GigE transfers data 10X faster (1Gbps).  The most common application here is to connect the camera to a local area network (LAN), thus allowing multiple remote PCs to access and control the camera provided they are all connected to the same LAN and are running the camera’s imaging software.  Another advantage is that the massive bandwidth allows multiple cameras to connect to a centralized imaging computer.  Depending on the imaging software, you could consider running multiple imaging experiments at the same time.

Multiple Connectivity

Today we are finding more cameras offering combinations of connectivity forms.  A camera with HDMI is commonly available with a USB connection. 

  • Teledyne Lumenera Infinity 5 cameras feature HDMI and USB
    • Watch live HD video on a monitor via HDMI. 
    • To ensure accurate color in the image, a white balance button is located on the camera housing.
    • Snap an image to on-board storage.
    • Connect to PC via USB and get all the benefits of camera control, image processing and analysis with INFINITY Analyze software (available at no cost).
  • ACCU-SCOPE Excelis HD camera has HDMI, USB and removable storage.
    • The Excelis HD will stream live HD video to a monitor, and also includes built-in software for better camera control and some basic measurement capabilities.  ACCU-SCOPE also offers a model with an attachable HD monitor for the ultimate in a stand-alone imaging system.
    • Connect the Excelis HD to a PC and control it using CaptaVision+ software.
    • Snap an image (or video) and save it directly to the removable SD card.  A convenient option to transfer those images to a PC at a later time.
  • ACCU-SCOPE Excelis 4K features both USB and HDMI connections and adds a GigE Ethernet port.
    • Live stream directly to a monitor via HDMI without a computer.  Use a 4K monitor for the best viewing.
    • Use the GigE port to connect to a local network.  Any computer on the same network and with CaptaVision+ installed can view live images and even control the camera.
    • The USB 3.0 port connects to your Windows or Mac PC for camera control and advanced imaging capabilities using CaptaVision+.
  • The ACCU-SCOPE SKYE WiFi 2 camera provides both WiFi and USB connection options.
    • The 2.4GHz and 5GHz WiFi bands are ideal for connecting to an Apple iOS or Android mobile device with the SKYE View 2 mobile app.
    • PC users can connect to the SKYE WiFi 2 camera by WiFi or USB and control the camera with the SKYE View 2 for Windows app.  Mac support is not yet available.
    • SKYE WiFi 2 supports up to 13 connected devices without appreciable loss in frame rate.

The take-home message:  Choose a camera that offers the best type of connection for your type of work.  Students love to use their cell phones, so a WiFi camera may be attractive for classroom settings (NOTE: Due to traffic on WiFi bands, only a few WiFi cameras may be able to operate simultaneously in a classroom environment).  A USB camera may be optimal for situations where you have a dedicated imaging station with a microscope and computer.  A GigE connection may be ideal for high bandwidth and access to live images across a facility’s computer network.  You have plenty of options!

Stop back later for our next issue where we’ll discuss controlling your camera.

Posted on

Top Considerations When Buying A Microscopy Camera, PART 6: Global vs. Rolling Shutter

With microscopy cameras, the term shutter refers to the way the camera sensor transfers the data off the chip.  Global shutters read out the data from the entire sensor at the same time and this provides a snapshot of the sample at a single point in time (refer to Figure 13).  A rolling shutter reads off the data row by row, or by alternating rows.  Since each row takes time to read off, the image may show the effect of the slight time delay, resulting in a smearing of the image (refer to Figure 14).  It is important to note that the shutter type is built into the sensor by the sensor manufacturer and not an accessory.

Figure 13. Readout timing for rolling and global shutter, with readout on the y axis and time on the x axis. A) Rolling shutter, acquisition begins at the top row and rolls down to the bottom row for frame 1, then frame 2 begins at the top row after a delay. B) G lobal shutter, the entire sensor begins and ends exposure simultaneously. 
Source: https://www.photometrics.com/learn/advanced-imaging/rolling-vs-global-shutter
Figure 14. A classic comparison of images captured with cameras featuring a rolling shutter (left panel) and global shutter (right panel).  Note the smearing of the fan blades in the rolling shutter example. 
Source: https://andor.oxinst.com/learning/view/article/rolling-and-global-shutter

The difference between rolling and global shutter is visualized in captured images.  The caveat is that when viewing live images, framerate is more important than the type of shutter.

Here is our recommendation:

  • Static, non-living or dead samples (basically, not moving), you can choose a camera with either a rolling or global shutter, in which case base your purchase decision on other camera parameters. 
  • Moving (this includes scanning or stitching) or living samples, a camera with a global shutter camera will serve you better.
  • If live image viewing is your goal (e.g., instruction, inspection, etc.) or if your sample has a high degree of motion (e.g., flagella, swimming, etc.), choose a camera with a fast framerate.

Tune in next time for our next post in the series when we discuss connectivity to your camera (i.e., how you interface with the camera) and data transfer.

Posted on

Top Considerations When Buying A Microscopy Camera, PART 5: Noise in Cameras

All cameras have it – noise that is – and it finds its way into your images.  The nature of electronics and signal amplification contribute to noise in your images, and heat on the camera sensor compounds the issue.  Not only does thermal noise degrade your image, but the warmer the sensor gets in the camera, the more noise that develops.

Figure 10. Rough approximation of the relationship of thermal noise to temperature of the camera sensor. 
Source: https://lairdthermal.com/thermal-technical-library/application-notes/thermoelectric-cooling-cmos-sensors

To correct for this, manufacturers integrate various cooling methods to remove the heat from the sensor, thereby reducing noise.

Figure 11. Example of reducing thermal noise in an image by cooling the camera sensor. Note the white pixels in the image on the left. With cooling (image on right), the hot spots are eliminated. 
Source: https://vision.vieworks.com/en/technology

Most cameras contain heat sinks to passively pull heat away from the sensor, but they only go so far.  Add a fan to help dissipate the heat from the heatsink and there is significant reduction in thermal noise.  Other cameras use Peltier thermoelectric cooling, liquid cooling, and combinations of these.  The cooler the sensor is kept, the lower the noise in your image.  The caveat is that the more technology built into the camera, the cost of the camera goes up.

Figure 12. Illustration of the placement of a thermoelectric cooling device in a camera housing. The heat sink facilitates the dissipation of heat from the thermoelectric cooler. 
Source: https://lairdthermal.com/thermal-technical-library/application-notes/thermoelectric-cooling-cmos-sensors

The take-home message here is to choose the amount of cooling you expect to need – less cooling is needed for brightfield color imaging and more cooling for very low light fluorescence or luminescence imaging where exposures tend to be longer.  For basic brightfield imaging regardless of magnification, we recommend an uncooled camera.  For low light imaging where sensitivity really matters (e.g., fluorescence), you should consider a cooled camera.  The following cooled cameras available from ACCU-SCOPE should be on your list to consider for low light and fluorescence imaging where longer exposures are more common:

BEST: Teledyne Lumenera INFINITY3-1, available in monochrome or color.

GOOD: ACCU-SCOPE MPX-20RC.

Our next part in this series will review the different types of electronic camera shutters and when you may choose a certain type.

Posted on

Top Considerations When Buying A Microscopy Camera, PART 4: CCD or CMOS?

The discussion of whether to choose a camera with a CCD or CMOS sensor is practically moot at this point.  CCDs (Charge-Coupled Device) were the norm up until a little more than a decade ago.  They offered better sensitivity and generated less noise in the signal (think of it as static) than their CMOS counterparts – this was all the result of the sensor architecture and how the data was transferred.  For even greater sensitivity, CCDs could be intensified (called ICCDs) to further amplify the signal.  ICCDs are still in use today and are suitable for very low light applications such as fluorescence and luminescence.  One last note about CCDs is that Sony discontinued production of CCDs in 2017, focusing their development efforts on CMOS technologies.  Other companies still manufacture CCDs, but attention has definitely shifted towards CMOS.

Figure 8.  Photons are converted to electrons in the pixel. CCD sensors read off the electrons row by row, and then the electrons are converted to voltage (analog to digital). In a CMOS sensor, this process happens within the pixel microelectronics.
Source: https://meroli.web.cern.ch/lecture_cmos_vs_ccd_pixel_sensor.html

CMOS sensors are generally less expensive to manufacture and rapidly found popularity in consumer cameras, cell phones and security cameras.  Due to their physical architecture, CMOS sensors lacked the sensitivity of CCDs.  More recently, manufacturers found that by flipping the architecture upside-down and putting the circuitry below the photodiode, sensitivity was dramatically improved, and electronic noise reduced as a result.  This CMOS sensor architecture is referred to as back-illuminated CMOS (Figure 9).

Figure 9. Backside Illuminated (or simply back-illuminated) sensors move the circuitry below the photodiodes to maximize photodiode access to photons. 
Source: https://www.stemmer-imaging.com/en/knowledge-base/vorder-oder-rueckseitig-beleuchtete-sensoren/

Although both CCD and CMOS sensor types are suitable for most imaging applications, the recent trend is toward CMOS.  The latest advancements in CMOS technology also makes it difficult to recommend a camera based solely on the camera sensor architecture (CCD vs. CMOS), and we suggest you consider other camera features that may be relevant for your individual application.

The next part this series will review noise control in cameras through cooling, and how much you need in your microscopy camera.

Posted on

Top Considerations When Buying a Microscopy Camera, PART 3: Resolution & Pixel Size

By now you understand if you need a color or monochrome camera, and you’ve determined how you will attach the camera to your microscope. But what about the “megapixels”?  More is better, right?  If you are using a microscope as your camera lens, our recommendation is not to follow the general consumer hype that more megapixels are better.  Although this may be true for your cell phone, the logic doesn’t transfer to your microscope.  Let’s look at resolution more closely from the perspective of microscopy imaging. Warning: This may get a little geeky.

Unfortunately, choosing the optimal camera resolution isn’t as easy as picking color or monochrome.  This will involve a little bit of math and in the end, you will have a general idea of when more resolution is better and when it’s not.

Optimal camera resolution (pixel size and # of pixels) depends on the resolution of the microscope and the magnification that is used for imaging.  In a microscope two objects are said to be “resolved” when they can be clearly distinguished from each other.  This is referred to as the Rayleigh Criterion – it defines the optical resolution of the microscope and is illustrated below.  When viewing objects in a microscope that are below the limit of resolution (we refer to them as point sources of light), each creates a pattern called an Airy disk, appearing somewhat like concentric ripples in water with a much taller peak in the middle.  Figure 6 below illustrates a sideview of the Airy disk pattern of two objects that are fully resolved, just resolved, and not resolved, respectively.

Figure 6. Airy disks are diffraction patterns around objects. The peak seen in these patterns indicates the central location of an object (point source). (b) illustrates the appearance of the Airy disk patterns when two objects are just barely resolved, called the Rayleigh Limit.
Source: https://micro.magnet.fsu.edu/primer/digitalimaging/deconvolution/deconresolution.html

Mathematically, the Rayleigh Criterion (d) is described as:

d = 0.61λ/NA

where λ is the wavelength of light and NA is the Numerical Aperture of the objective (this assumes that your microscope has been correctly adjusted for Köhler illumination, so the condenser has the same NA as the objective). Why does the wavelength of light matter? Simply stated, resolution improves with shorter wavelengths — better resolution with blue light than red.

In microscopy, Rayleigh’s criterion is typically expressed in nm (nanometers) or µm (microns, micrometers).  So how does this fit with the number of pixels in a camera?  The Nyquist-Shannon theorem requires a sampling interval (in our case the pixels of the camera) that is at least twice the optical resolution.  You can also think of the Airy disk of each object being covered by at least 2 pixels.  Consider that each of the two objects mentioned above are so small that they are only detected by one pixel each – their size is at or below the optical resolution of the microscope.  If the objects are detected by adjacent pixels, we couldn’t tell if it were two objects or one slightly larger object.  But if there is an empty pixel between them thereby satisfying the Nyquist-Shannon criterion, then we can say that the two objects are resolved on the camera.

Below is a figure adapted from the Cell Sciences Imaging Facility at Stanford University.  It illustrates two objects (point sources) that are separated by the resolution of the microscope according to Rayleigh’s Criterion.  The Airy disks for each cover approximately 3 pixels wide on the camera sensor.  Therefore you can see that the bright peaks of each Airy disk can be clearly identified by single pixels that are well separated by two other pixels.  If we move the objects closer together, you can see that we would not be able to definitely say that our camera can detect two separate objects or just one that may span two pixels.

Figure 7. Airy disks generated by two objects (point sources of light) as detected by pixels of a digital camera sensor. At theoretical maximum optical resolution, the Airy disk for each object must cover >2 pixels. Where the Airy disks overlap more, the centers occupy adjacent pixels and, thus, the objects cannot be separated.
Source: https://microscopy.stanford.edu/fundamental-concepts

Magnification adds an additional more variable to the calculation for camera resolution.  Higher magnifications project larger images onto the camera sensor, so the pixels can be larger and still satisfy the Nyquist-Shannon criterion.  Larger pixels collect more light and, therefore, are more sensitive.

So here is the quick takeaway message about camera resolution.  If you are using lower magnifications (e.g., stereo microscopes at lower zoom levels), then you will want smaller pixels and more of them.  If you are imaging at higher magnifications (e.g., 40X objective and higher), then you will want larger pixels.

Below are our recommendations for cameras depending on your microscope and magnification. Although they may not exactly fit the criteria discussed above, they are reasonably close and will perform adequately.

Stereo Microscopes:

Upright and Inverted Microscopes (40X objective or higher):

  • BEST:
    • Teledyne Lumenera INFINITY3 series cameras (4.54µm – 6.45µm pixels, depending on model; color or monochrome)
    • Teledyne Photometrics Moment camera (4.5µm, monochrome only)
  • BETTER:
  • GOOD:
    • ACCU-SCOPE Excelis HD.  8MP color camera with built-in software for stand-alone operation or USB connection to PC.

Upright and Inverted Microscopes (lower than 40X objective):

For a deeper dive into resolution with some examples using different objectives, please read this blog on the Teledyne Lumenera website.  More information on microscope resolution, Nyquist and Shannon sampling theorems and camera selection can be readily found on the internet.

In the next part of this series, we will discuss the different types of camera sensors and how they may impact your imaging.